Overview & Location

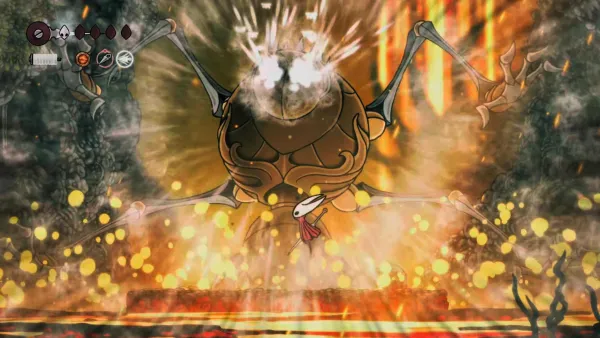
The Fourth Chorus is one of the most visually spectacular boss encounters in Hollow Knight: Silksong. This towering iron automaton serves as an intensive tutorial for the Drifter's Cloak gliding ability, challenging you to master aerial movement while dodging devastating attacks in a lava-filled arena.
Located in Far Fields, this boss becomes active only after you obtain the Drifter's Cloak from the Seamstress. When you backtrack west through the area, you'll find this dormant giant has awakened to block your path.
Quick Stats
- Health: 500 HP
- Location: Far Fields (lava arena)
- Requirement: Drifter's Cloak
- Achievement: "Servant" (15G)
Lore & Background
"Towering iron automaton, driven by rotor and cog. A terrifying achievement of Pharloom, to build a construct so large and yet so nimble." — Hunter's Journal
The Fourth Chorus is one of four giant automatons built by the Citadel for unknown purposes—possibly combat. After the Citadel betrayed the order of the Pinstress, these machines were deployed to hunt down surviving members of the order.
This particular automaton engaged the Seamstress in battle before she managed to subdue it by impaling her pin in its neck. The machine lay dormant until Hornet's arrival with the Drifter's Cloak triggered its reactivation.
Fun fact: The Fourth Chorus is animated by Silk Flies—when you defeat it, you'll see them escape from its head. Its lower half has eroded away from prolonged submersion in lava, explaining why it's stuck in place during the fight.
Preparation & Loadout
Recommended Loadout
- Ability: Silkspear (great reach for head attacks)
- Blue Tool: Magma Bell (reduces lava + fire damage)
- Alternative: Sting Shard (spike traps during openings)
- Crest: Hunter Crest (balanced stats)
Important Notes
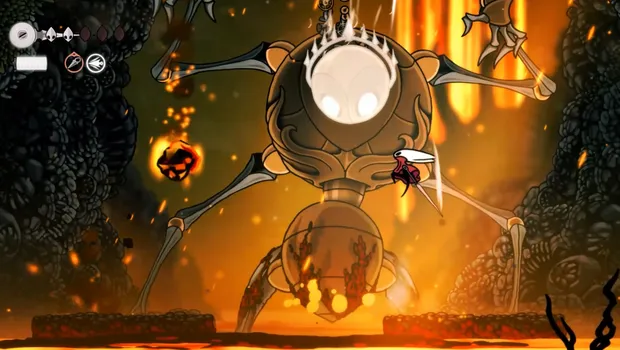
- Only the head takes damage
- Hitting hands/body does nothing
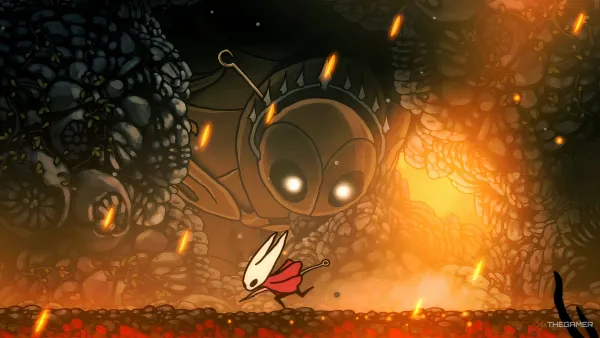
- Drifter's Cloak is essential for evasion
- Lava deals continuous damage if touched
Pro tip: The Magma Bell is highly recommended since the arena shrinks as platforms sink into lava. It'll save you from a lot of chip damage when you accidentally touch the molten stuff.
Attack Patterns
Swipe
The boss sweeps one of its lower arms across the entire arena floor. The left hand swipes from left to right, and vice versa.
Counter: Jump or use Drifter's Cloak to glide over the sweep. Time your descent to land safely and rush in for head attacks while the arm recovers.
Slam
Fourth Chorus raises one of its upper arms and slams it down at your position. This causes 1-2 platforms to sink into the lava, permanently shrinking your arena until they slowly resurface.
Counter: Watch for the raised arm and dash to the side. The boss sometimes chains two Slams in a row, forcing you onto a very small safe platform. Stay mobile!
Rock Dance (Phase 2+)
After reaching 450 HP, the boss slams the ceiling multiple times, causing molten rocks to rain down in 7-8 waves. Landing spots are telegraphed by shadows.
Counter: The rocks fall slowly, so dodge them while staying aware that the boss may mix in a melee attack. This is actually a good damage window—weave between falling rocks and get hits on the head.
Phase Breakdown
Phase 1: 500-450 HP
Basic attacks only—Swipe and Slam. Learn the timing here. The boss moves at a moderate pace, giving you plenty of time to react.
Phase 2: 450-325 HP
Attack speed increases. Rock Dance is introduced. The arena may start feeling cramped as more platforms sink into lava.
Phase 3: 325-200 HP
Further increased attack speed. All attacks are in rotation. Stay patient and wait for safe windows—don't get greedy.
Final Phase: 200 HP and below
Attack speed actually decreases! The outer platforms are destroyed, but updrafts appear on both sides of the arena. You can now trigger the optional boulder finisher (see below).
Strategy & Tips
Positioning
- Stay near the center of the arena
- Don't hug the walls—gives less room to dodge
- Keep track of which platforms have sunk
- Be ready to adjust as arena shrinks
Damage Windows
- After dodging Swipe—rush to arms, hit head
- During Rock Dance—weave and attack
- Post-Slam recovery—quick hits then retreat
- Use Sting Shard during safe moments
Key insight: Despite its intimidating size, Fourth Chorus has predictable patterns due to its large frame. The real challenge is managing your space as the arena shrinks. Don't panic—keep your cool and the fight becomes very manageable.
The Boulder Finisher (Optional)
Here's the coolest way to end this fight! In the final phase (below 200 HP), two wind currents (updrafts) appear on each side of the boss. You can use these for a spectacular environmental kill:
How to Execute the Boulder Finisher
- Use the Drifter's Cloak to ride an updraft to the ceiling
- Look for glowing explosive magma rocks on each side
- Attack both rocks (one on each side of the arena)
- This triggers a massive boulder to fall from the center
- The boulder crushes Fourth Chorus's head, defeating it instantly
While this method isn't required—you can just keep hitting the head until it dies—it's a much more satisfying way to finish the fight and really shows off what Team Cherry can do with environmental gameplay.
Rewards
Achievement
"Servant" - Defeat the Fourth Chorus (15G)
Hunter's Journal
Unlocks the Fourth Chorus bestiary entry with full lore and illustration.
Wrapping Up
Fourth Chorus might look terrifying with its massive iron frame and devastating attacks, but once you understand its patterns, it becomes a really enjoyable fight. The arena management aspect adds tension without being unfair, and the optional boulder finisher gives you an awesome alternative to just whittling down its health.
If you're struggling, remember: Magma Bell is your friend, only the head takes damage, and staying central gives you the most room to maneuver. Good luck, and enjoy watching that giant construct crumble!
You've got this! Time to show that automaton who's boss.