
Overview & Prerequisites
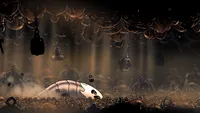
Bell Beast is the second major boss in Hollow Knight: Silksong, found trapped in silk at the entrance to The Marrow. This armored behemoth looks like a giant isopod, with thick white plates covering its entire body. Once freed, it immediately attacks - and beating it unlocks the game's fast travel system.
Unlike Moss Mother, Bell Beast hits like a truck. Every single attack deals two masks of damage, making this fight much less forgiving. The good news? Its attack patterns are telegraphed by dust clouds and steam, giving you plenty of time to react if you know what to look for.

Prerequisites
- Silkspear ability - Get this from Mosshome by interacting with the spider effigy
- Travel to The Marrow entrance where Bell Beast is trapped in silk
- Use Silkspear to break the silk trap - this triggers the boss fight immediately!
Pro tip: Make sure you're fully healed and have full Silk before breaking the trap. There's no chance to back out once you free the Bell Beast!
Attack Patterns
Bell Beast stays underground most of the fight, emerging only to attack. The key is reading the dust clouds - they tell you exactly where and how the boss will attack.
Charge Attack
Bell Beast emerges from one side and charges straight across the arena. The initial dust cloud barely grazes the bottom of the bell hanging in the foreground - this is your visual cue.
Counter: Jump and pogo off its back as it passes beneath you. This is your best damage window - you can land 2-3 hits safely.
Leap Attack
Bell Beast leaps in a high arc across the entire arena, slamming down on the opposite side. The dust cloud completely envelops both foreground bells - it's much taller than the charge attack dust.
Counter: Run beneath it while it's airborne and slash at its belly, or back away to the wall so the jump doesn't reach you. It pauses briefly after landing - get in 1-2 hits.
Bell Burst

Bell Beast pops its upper body out of the ground, sending two large bells rolling in opposite directions. Steam rises as a warning before it emerges.
Counter: If you're close, run toward the Beast so the bells pass over your head. If you're far, jump over the bells as they roll past. Don't try to hit the boss during this attack.
Surprise Burst
The ground shakes and steam rises from a specific spot, then Bell Beast bursts upward to strike. This attack is designed to catch you off guard while you're focusing on other patterns.
Counter: As soon as you see steam rising, jump away immediately. The steam shows exactly where the attack will come from.
Phase 2: Falling Bells
At roughly half health (~15 hits with Needle), Bell Beast lets out a roar and Phase 2 begins. The arena becomes much more chaotic as bells start raining from the ceiling.
Phase 2 Changes
- Bell Drop: A bell falls from the ceiling after every Leap Attack
- Extra Bell: A third bell drops near where Bell Beast burrows during Bell Burst
- Bell Rain: Bell Beast emerges center, screams, and bells rain from the ceiling - each bounces twice before disappearing
Critical Warning
During the Bell Rain attack, stop attacking. Focus entirely on dodging. Watch the ceiling, move to one side, and stay mobile until the bells stop falling. Getting greedy here will get you killed.
Strategy & Tips
Core Strategy
This fight is all about pattern recognition and patience. Bell Beast is slow and predictable - every attack is telegraphed by dust or steam. Don't rush, wait for safe openings, and punish the recovery windows after each attack.
Step-by-Step
- 1 Read the dust: Small dust = Charge (jump and pogo). Tall dust reaching the bells = Leap (run under or away).
- 2 Pogo the charge: Your best damage comes from jumping over the Charge and pogoing off Bell Beast's back. Time it so you're airborne when it passes.
- 3 Watch for steam: Steam = danger incoming. Jump away immediately when you see it rising from the ground.
- 4 Respect Phase 2: When bells start falling, prioritize dodging over damage. The fight takes ~25-30 hits - no need to rush.
- 5 Heal during Bell Rain: Ironically, the Bell Rain attack gives you time to heal if you position well. Move to an edge and Bind while dodging.
Common Mistakes
-
- Not reading the dust cloud height (leads to wrong dodge)
-
- Trying to heal at unsafe moments (double damage = fast death)
-
- Getting greedy during Phase 2 Bell Rain
-
- Standing still too long (the Surprise Burst will catch you)
Rewards
Defeating Bell Beast grants you one of the most important rewards in the game - access to the Bellways fast travel system. After the fight, a cutscene plays where Bell Beast calms down and becomes your ally.
What You Unlock
- Fast Travel (Bellways) - Travel instantly between Bone Bottom and The Marrow
- Future stations - More fast travel points unlock as you explore
- Silk Heart - Increases your maximum Silk capacity
Lore note: "This one has allied themself with me, either as thanks for their saving or respect for one judged as equal." - Bell Beast now serves as Hornet's transportation through the Bellways network.
Wrapping Up
Bell Beast is a significant step up from Moss Mother, teaching you to read enemy telegraphs and punish safely. The double damage means you can't just tank hits - every mistake is costly. But stick to the patterns, stay patient, and you'll have fast travel unlocked in no time.
Once you've beaten Bell Beast, the game really opens up. Fast travel makes exploring Pharloom much more convenient, and you've proven you can handle Silksong's tougher fights. The bosses ahead only get harder - but you've got the fundamentals down now.
Remember: Read the dust, pogo the charge, respect the bells!